Before Azure Data Lake Gen2 and Azure Databricks, In our previous articles, we elaborated about two aspects of Azure Data Lake Gen2 migration i.e. governance and security. In terms of tasks, we elaborated upon administrative and ETL tasks, with Powershell and Azure Data Factory respectively. Please find the details of those articles at the end.
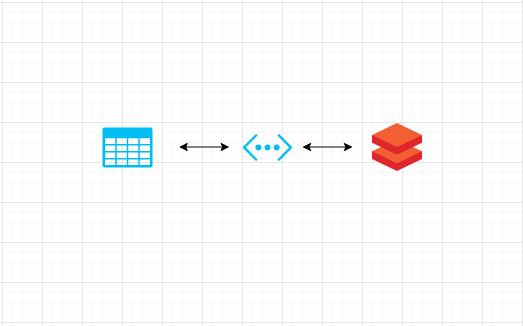
ETL with ADLS Gen2 and Azure Databricks
Having said all that, Azure Databricks is a key service in modern azure data architecture. In fact, it is the compute engine of choice for analytical workloads on top on Azure Data Lake. Hence, Azure Databricks is the engine of choice for ADLS Gen2.
However, moving from Databricks code from ADLS Gen1 and Gen2 comes with its own set of nuances. Following are the major aspects:
- Deploying Azure Databricks to a VNET.
- Whitelisting the created VNET in Azure Data lake Gen2.
- Spark Configurations.
Step 1: Deploying Azure Databricks to a VNET
One of the key features of Azure Data Lake Gen2 is additional security since it will be firewall enabled. You can allow access to only certain IPs or networks to your storage account. However, since Azure Databricks is not a trusted service of Microsoft, it cannot be granted access to Databricks using Managed Identity. Neither can it be whitelisted since it does not have a static IP.
Hence, to dodge the problem of dynamic IP’s, we need to deploy Azure Databricks to a Private Network, also called as Virtual Network (VNET). This allows Azure Databricks to connect to data lake gen2 on Azure network resources and take on addresses in a private space. Please note that you cannot add the existing Databricks to a VNET. Hence, creating a new Databricks workspace is inevitable.
However, for deploying Azure Databricks to a VNET, you should create a VNET in the first place:
- Firstly, you need to have an address space reserved for your team. This is also called as CIDR blocks. Your networking team will help you gain access to such a space.
- Create a VNET using the CIDR blocks/ address range. Follow this Microsoft documentation to create a VNET.
- Now, create a new Azure Databricks workspace within the same VNET. Follow this link for more details.
Step 2: Whitelisting the created VNET in Azure Data lake Gen2
Once, you are ready with your Azure Databricks setup, you need to whitelist your virtual network and all its subnets in the Azure Data Lake Gen2. You can do this in the Firewalls and Virtual networks section from your management pane in Azure Portal.
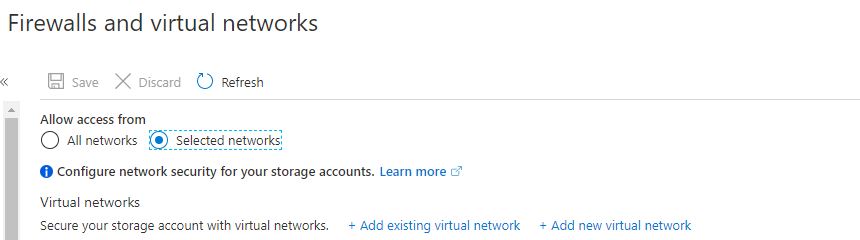
Click on ‘Add existing virtual network’ and select your subscription and VNET in which your Azure Databricks is deployed. Make sure you include all the subnets.
Step 3:Spark Configurations
Having said that, here comes the most important step: the spark configurations. Please remember that Azure Databricks is not a trusted service. Hence, we need to use service principal authentication. To know more about service principal authentication, refer to this link. Please make sure that you grant appropriate access to Azure Data Lake Gen2 to your service principal.
Coming back, the below script will help you connect to Azure Data Lake Gen2 if you intend to use Dataframes. For more details, refer to this documentation.
adlsuri = "abfss://[email protected]"
storageAccountName = "myaccountname"
fileSystemName = "myfilesystemname"
tenantID = "mytenantid"
serviceprincipalID= "myserviceprincipalid"
serviceprincipalkey= "myserviceprincipalkey"


spark.conf.set("fs.azure.account.auth.type.<storageAccountName>.dfs.core.windows.net", "OAuth")
spark.conf.set("fs.azure.account.oauth.provider.type.<storageAccountName>.dfs.core.windows.net", "org.apache.hadoop.fs.azurebfs.oauth2.ClientCredsTokenProvider")
spark.conf.set("fs.azure.account.oauth2.client.id.<storageAccountName>.dfs.core.windows.net", "<serviceprincipalID>")
spark.conf.set("fs.azure.account.oauth2.client.secret.<storageAccountName>.dfs.core.windows.net", "<serviceprincipalkey>"))
spark.conf.set("fs.azure.account.oauth2.client.endpoint.<storageAccountName>.dfs.core.windows.net", "https://login.microsoftonline.com/<tenantID >/oauth2/token")
In the above script, I need to highlight an important point. DO NOT hardcode the servicepriciplekey. Use secret scopes to store them. There are two types of secret scopes in Azure Databricks viz. Key vault backed and Databricks backed. We have used key vault backed secret scope in the following article: Lambda Architecture with Azure Databricks
Conclusion
Hope that this article was helpful. We are neither guaranteeing its completeness or accuracy. Reader discretion is advised.
P.S.
For the PowerShell piece, refer to this article of ours: Managing Azure Data Lake Gen2 with Powershell. Prior to that, we have also addressed the ETL aspect using Azure Data Factory. This covers the security aspect as well using Managed Identity, spanning across two articles i.e. Managed Identity between Azure Data Factory and Azure storage(RBAC) and Azure Data Lake Gen2 Managed Identity using Access Control Lists.