Firstly, we urge you to read this article of ours: Managed Identity between Azure Data Factory and Azure storage. In that article, we have extensively elaborated on different authentication methods in the Azure ecosystem. Moreover, we specifically focussed on Managed Identity access to Azure Data Factory on Azure Data Lake gen2. As we all know, Microsoft has added Azure Data Factory as a trusted service to Azure Storage(Azure data lake gen2 in this case).
However, in the above article, we demonstrated the managed Identity using Role-Based Access control, also popularly known as RBAC. While RBAC is simple with a variety of roles, it has an inherent disadvantage that it is generic. To elaborate, it gives access to all folders and directories with requisite permissions. Generally, in industries like finance and healthcare, such access is out of the question, owing to strict data regulation policies. This brings us to another approach to data security i.e. Discretionary Access Control (DAC)
Discretionary Access Control
In Discretionary Access Control(DAC), users are granted permissions at the individual object levels instead of service level. In the above article, you will see that assigning a role to a user grants access to all the folders/containers. That was an example of RBAC. However, in many organisations, this isn’t allowed. Hence DAC needs to be implemented using Access control lists(ACL).
ACL is a table which lists permissions to a data object. Moreover, it also defines the actions that can be carried out by a particular user. The data object might be a container or a folder or a file. Let us see how this works in Azure Data Lake Gen2 storage with the following demo.
Step 1:Setup
We assume that you know how to create Azure Data Lake storage gen2 account. If not, kindly refer to this document. Furthermore, in this demo, we will use the Azure Data Factory to connect to Azure Data lake Gen2 storage, since it is now a trusted service in Azure Storage. Refer to this document to create an Azure Data Factory V2.
Step 2: Azure Data Factory Managed Identity Object ID
As pointed out in our article mentioned in the beginning, Managed Identity is built-in service principal. Hence, every Azure Data Factory has an object ID similar to that of a service principal. Thus, we need to retrieve the object ID corresponding to the ADF. We can find it in the ‘Properties’ tab in ADF.

Step 3: Azure Data Lake Gen2 storage Access control
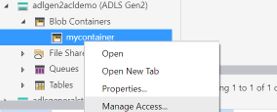
In the penultimate step, let us add the ADF managed identity object id to the Access control list of our ADLS Gen2 named ‘adlgen2acldemo’. To do this, download Azure Storage Explorer, which is available as a desktop application. After installing it, sign in to your Azure Subscription. Locate your storage account. Further, create a container and a folder in the ADLS Gen2.
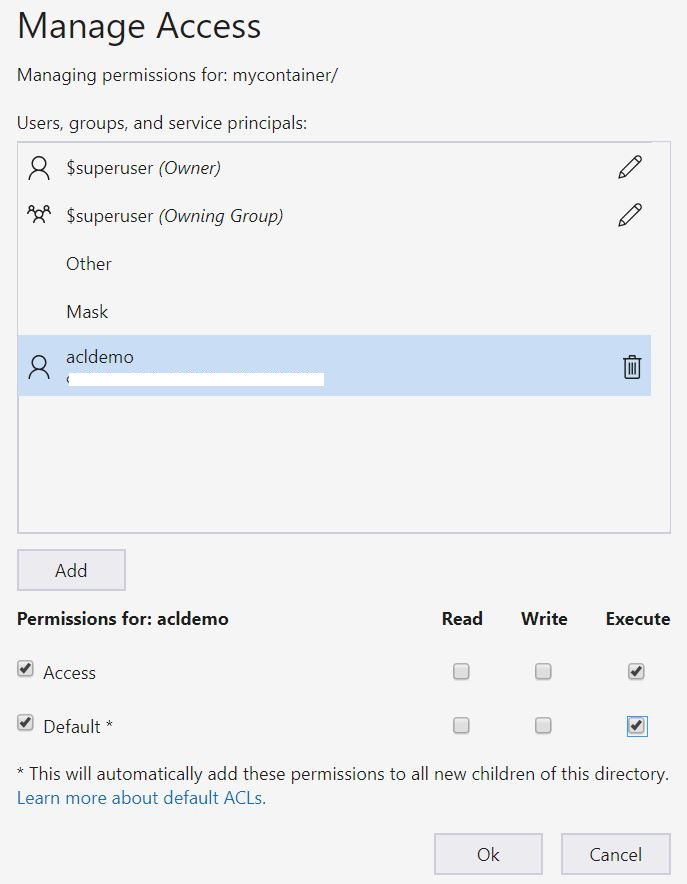
‘Open the container in the Azure Storage. Right-click and select Manage Access.
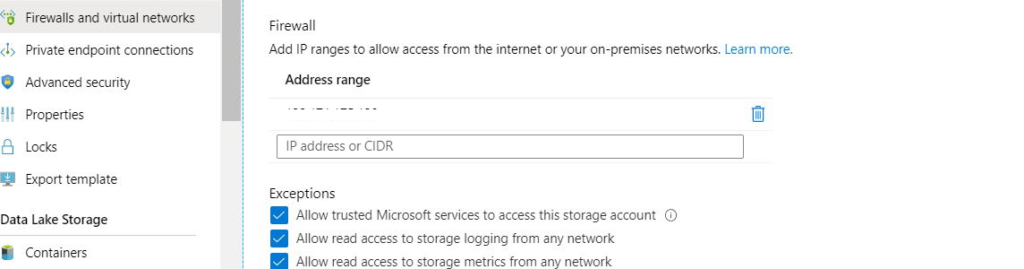
Before that, remember to go to the firewall section in your storage account and enable trusted services and add your Client IP.
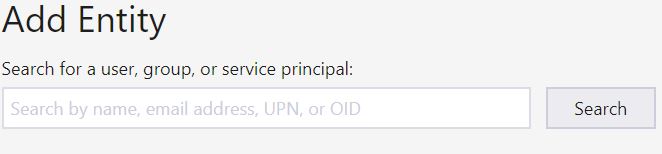
Once you do that, select the ‘Manage Access’ option for your container and click on add. It will open up a text box. Add your ADF managed identity Object ID to it and click search.
Select appropriate permissions to the user and click on Ok. For the container, we select execute permission.
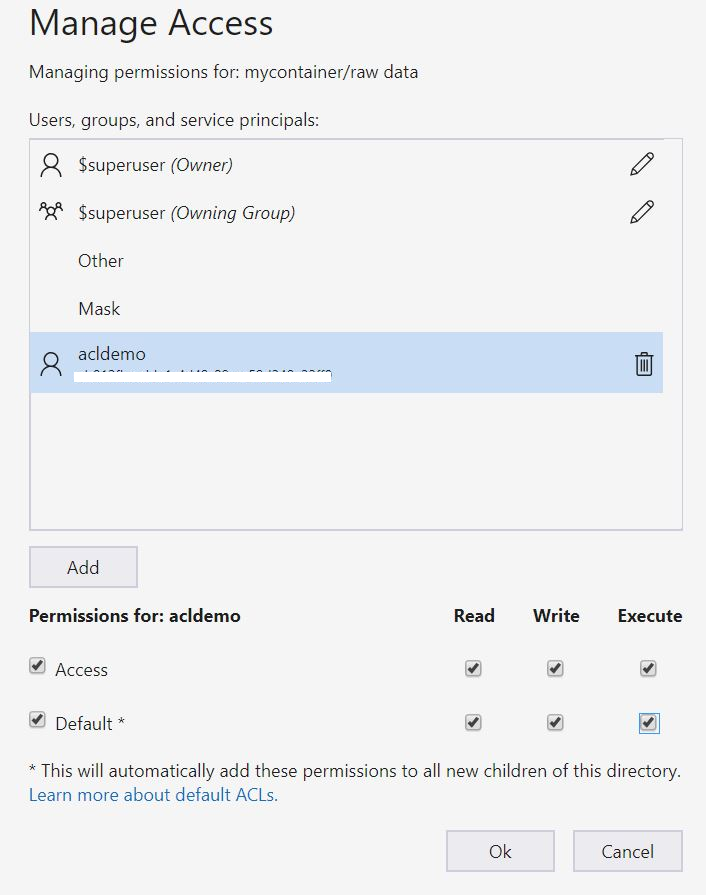
Follow a similar procedure for the folder in your container as well. Here we select all the permissions i.e. to read, write and execute.
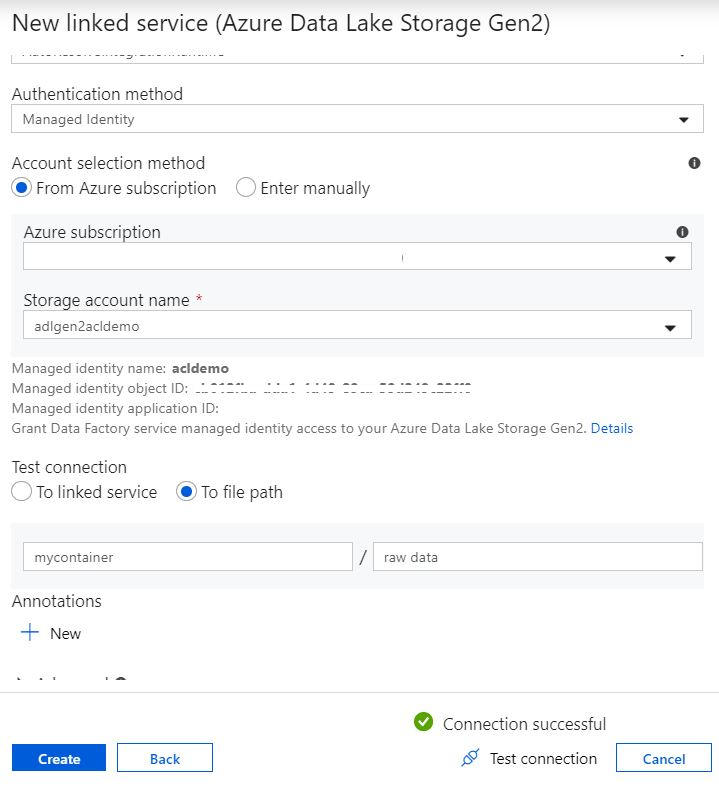
Step 4: Connect Azure Data Lake Gen2 from ADF.
Once you are done with granting all the permissions, open your Azure Data Factory and create a new connection as follows. Select the managed identity authentication option along. Test the connection to the file path. Please note that you need to mention the container name and folder name that you gave access to the ADF in the third step.
Conclusion
Hope this article helps you. Please note that this is for information purpose and we make no guarantees regarding its exhaustiveness. Please try it out for yourself and make an informed decision.