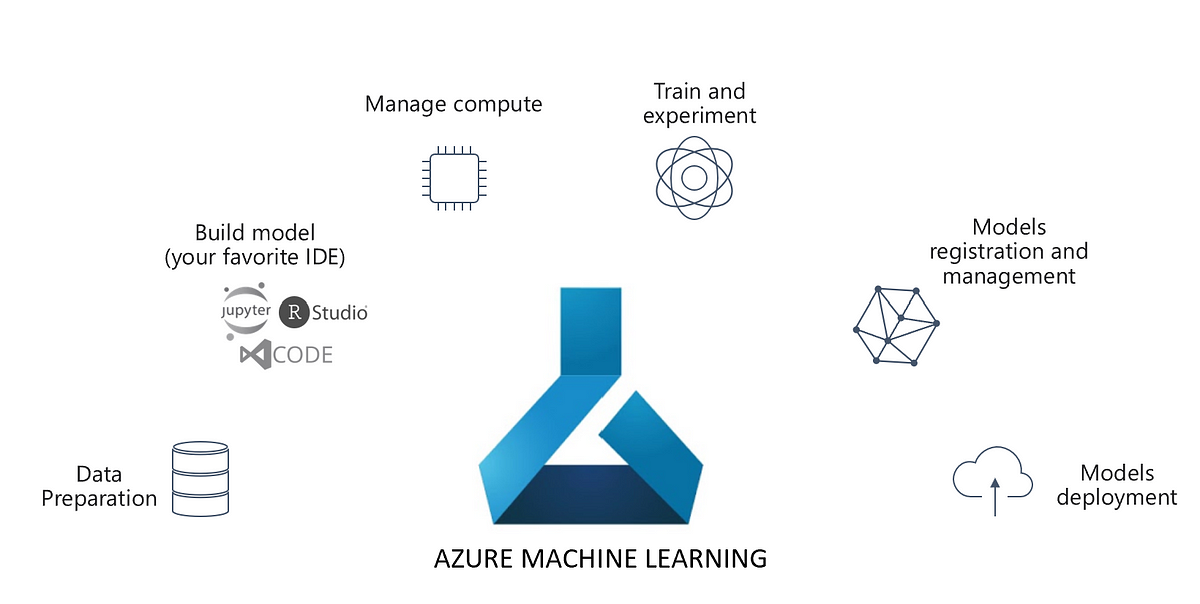
The two pillars of the Azure AI platform are Azure Databricks and Azure Machine Learning. And, this is a common debate in Azure AI circles. Naturally, the question arises, which platform? Both have their own capabilities, strengths, and weaknesses. Yet, in the world of competition, there as spaces to co-operate. In this article, we will see if the two wonderful platforms viz. Azure Databricks and Azure Machine Learning can co-operate.
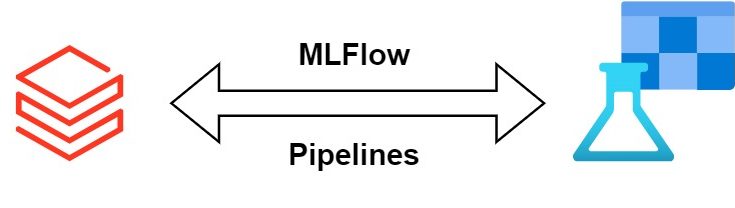
There are two ways in which Azure Machine Learning and Azure Databricks can work together:
- Azure Databricks Telemetry logged into Azure Machine Learning.
- Running Azure Databricks scripts from Azure Machine Learning.
1. Azure Databricks Telemetry logged into Azure Machine Learning.
In this mode of operation, the Azure Databricks takes the centre stage, while the Azure Machine Learning acts as a Model Registry. This setup is like Machine Learning using Azure Synapse SQL, where all the heavy lifting is done by the Azure Synapse engine. Similarly, in this case, the entire lifecycle is built using the Azure Databricks Engine. But, the telemetry viz. Experiments, Models, Endpoints etc. are logged to Azure Machine Learning. Let’s take a look at an example.
Once again, we will use our favourite California Housing Dataset as a running example. We will take the following steps:
- Connect to Azure Machine Learning workspace
- Load the California Housing Dataset
- Model Training
- Set MLFlow Tracking Uri
- Train the Model
- Register the Model
- Model Serving
- Prepare Scoring Script and Deployment Environment
- Deploy the Model to the Target Environment
- Consume the deployed service
However, before that, some setup is essential. Open your Databricks cluster and install the following libraries via PyPI:
- azureml-sdk[databricks]
- sklearn-pandas==2.1.0
- azureml-mlflow
Next, open a python notebook and import some common libraries:
import os
import numpy as np
import pandas as pd
import pickle
import sklearn
import joblib
import math

from sklearn.model_selection import train_test_split
from sklearn.ensemble import GradientBoostingRegressor
from sklearn.pipeline import Pipeline
from sklearn.impute import SimpleImputer
from sklearn.preprocessing import StandardScaler, OneHotEncoder
from sklearn_pandas import DataFrameMapper
from sklearn.metrics import mean_squared_error, mean_absolute_error, r2_score

import matplotlib
import matplotlib.pyplot as plt

import azureml
from azureml.core import Workspace, Experiment, Run
from azureml.core.model import Model

print('The azureml.core version is {}'.format(azureml.core.VERSION))
Step 1: Connect to Azure Machine Learning workspace from Azure Databricks workspace.
Once the libraries are installed and imported, connect the databricks to the Azure ML workspace. However, the following parameters pertaining to Azure ML are necessary:
#Provide the Subscription ID of your existing Azure subscription
subscription_id = "<YOUR-SUBSRCIPTION-ID>"

#Replace the name below with the name of your resource group
resource_group = "<YOUR-RESOURCE-GROUP>"

#Replace the name below with the name of your Azure Machine Learning workspace
workspace_name = "<YOUR-AML-WORKSPACE-NAME>"
Next, comes authentication. We will use the Service Principal Authentication to authenticate to Azure ML. To know more about Service Principal Authentication, read this. Besides, the Service Principal needs to be assigned the Azure ML Data Scientist role in the Azure ML workspace.

The following script then helps Azure Databricks authenticate to Azure Machine Learning:
import os
from azureml.core.authentication import ServicePrincipalAuthentication

svc_pr = ServicePrincipalAuthentication(
                        tenant_id="<YOUR-TENANT-ID>",
                        service_principal_id= "<YOUR-PRINCIPLE-ID>",
                        service_principal_password="<YOUR-PRINCIPLE-PASSWORD>")


ws = Workspace(
         subscription_id=subscription_id,
         resource_group=resource_group,
         workspace_name=workspace_name,
         auth=svc_pr
         )
2. Load the California Housing Dataset
Next, load the California Housing Dataset for Model Training. We use the built-in Scikit Learn Dataset named California Housing Prices. Read more about it here.
import pandas as pd
from sklearn.datasets import fetch_california_housing

california_housing = fetch_california_housing()
pd_df_california_housing = pd.DataFrame(california_housing.data, columns = california_housing.feature_names)
pd_df_california_housing['target'] = pd.Series(california_housing.target)
3. Model Training
Next, we begin the model training. The first step would be to create the MLFlow tracking URI, pointing to Azure ML Workspace. For starters, MLFlow is an ML Lifecycle Management Library by Databricks. It helps Data Scientists track experiments, logs, metrics, models, outputs, etc. Moreover, it works well with Azure Machine Learning. To know more, read this.
Having said that, here is the script to create the MLFlow Tracking URI and the model training experiment named ‘exp-adb-aml-connection’. Here is the script to create the tracking URI.
import mlflow
mlflow.set_tracking_uri(ws.get_mlflow_tracking_uri())
print("MLflow tracking URI to point to your Azure ML Workspace setup complete.")
And here goes the experiment.
experiment_name = 'exp-adb-aml-connection'
mlflow.set_experiment(experiment_name)
print("Experiment setup complete.")
Once this is done, let’s create a model training pipeline using Scikit Learn Pipelines. However, let’s create a folder first to store the model file.
print("Training model...")
output_folder = 'outputs'
model_file_name = 'california-housing.pkl'
dbutils.fs.mkdirs(output_folder)
model_file_path = os.path.join('/dbfs', output_folder, model_file_name)
Before building a pipeline, a note on Scikit Learn Pipelines. An ML training Workflow comprises multiple steps viz. Data Preprocessing, Feature Engineering, Model training etc. ML Pipelines assemble several steps of ML workflow into one cohesive unit. For this exercise, we will use the famous Scikit Learn implementation of ML Pipelines. Let’s dive into the code.
with mlflow.start_run() as run:            #Start MLFlow Tracking
   df = pd_df_california_housing.dropna()  #Drop Missing Values
   x_df = df.drop(['target'], axis=1)      #Create Feature Set
   y_df = df['target']                     #Create Label

   X_train, X_test, y_train, y_test = train_test_split(x_df, y_df, test_size=0.2, random_state=0) #Train-Test Split

   numerical = ['MedInc', 'HouseAge', 'AveRooms', 'AveBedrms', 'Population', 'AveOccup','Latitude','Longitude']    #List all Numerical Features

   numeric_transformations = [([f], Pipeline(steps=[
      ('imputer', SimpleImputer(strategy='median')),                                         #Imputation and Scaling for all numerical variables.
      ('scaler', StandardScaler())])) for f in numerical]

   transformations = numeric_transformations

   clf = Pipeline(steps=[('preprocessor', DataFrameMapper(transformations, df_out=True)),    #Define the pipeline and its steps
                         ('regressor', GradientBoostingRegressor())])

   clf.fit(X_train, y_train)                         #Fit the Model

   y_predict = clf.predict(X_test)                   #Predict on the test data
   y_actual = y_test.values.flatten().tolist()

   rmse = math.sqrt(mean_squared_error(y_actual, y_predict))   #Calculate and log RMSE
   mlflow.log_metric('rmse', rmse)
   mae = mean_absolute_error(y_actual, y_predict)    #Calculate and log MAE
   mlflow.log_metric('mae', mae)
   r2 = r2_score(y_actual, y_predict)                #Calculate and log R2 Score
   mlflow.log_metric('R2 score', r2)

   plt.figure(figsize=(10,10))
   plt.scatter(y_actual, y_predict, c='crimson')     #Scatter Plot
   plt.yscale('log')
   plt.xscale('log')

   p1 = max(max(y_predict), max(y_actual))
   p2 = min(min(y_predict), min(y_actual))           #Plot regression line
   plt.plot([p1, p2], [p1, p2], 'b-')
   plt.xlabel('True Values', fontsize=15)
   plt.ylabel('Predictions', fontsize=15)
   plt.axis('equal')

   results_graph = os.path.join('/dbfs', output_folder, 'results.png') #Log the graph plotted above
   plt.savefig(results_graph)
   mlflow.log_artifact(results_graph)

   joblib.dump(clf, open(model_file_path,'wb'))      #Log the Model
   mlflow.log_artifact(model_file_path)
The plot looks like this:
 To check the experiments that have been logged, retrieve the workspace experiments.
aml_run = list(ws.experiments[experiment_name].get_runs())[0]
aml_run
This will provide you with the link to the experiment details logged in Azure Machine Learning. Clicking on the Link to Azure ML Studio will redirect you to the Experiment Details:
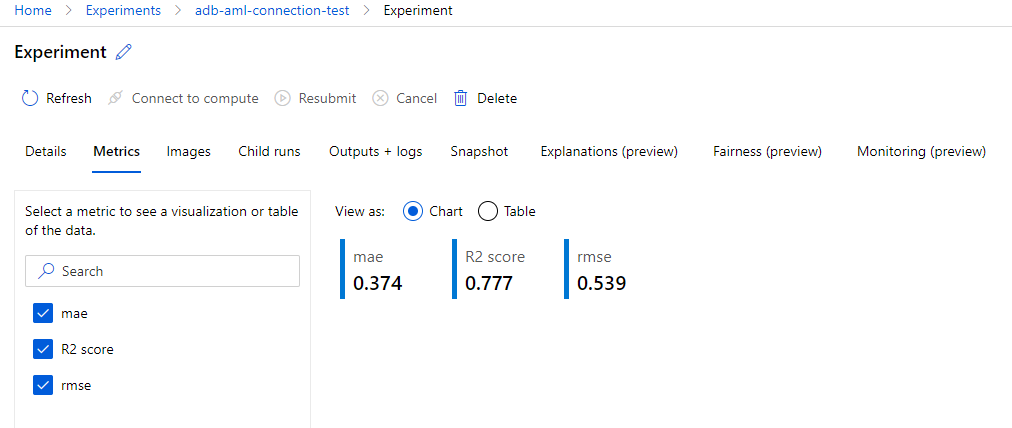
Experiment Metrics
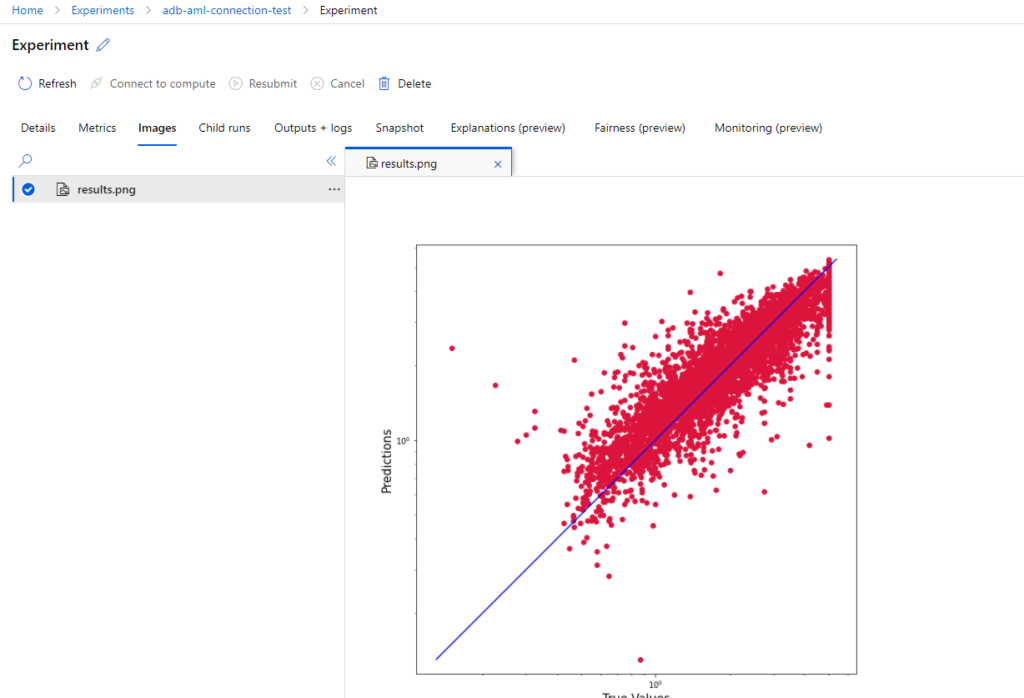
Experiment Results
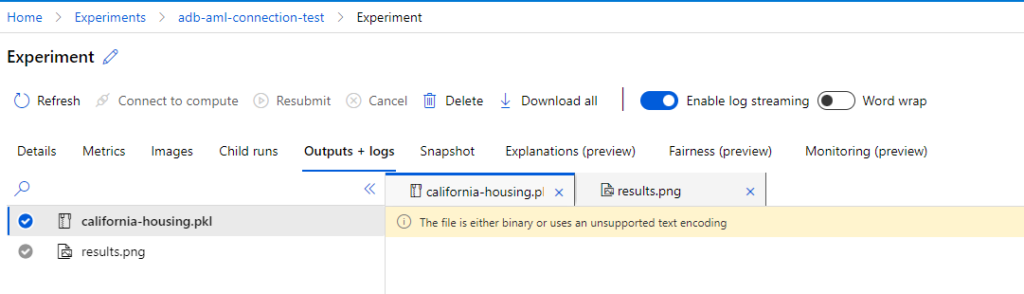
Logged Model
Lastly, register the model using the below script:
model_name = 'california-housing-prices'
model_description = 'Model to predict housing prices in California.'
model_tags = {"Type": "GradientBoostingRegressor",
"Run ID": aml_run.id,
"Metrics": aml_run.get_metrics()}

registered_model = Model.register(model_path=model_file_path, #Path to the saved model file
model_name=model_name,
tags=model_tags,
description=model_description,
workspace=ws)
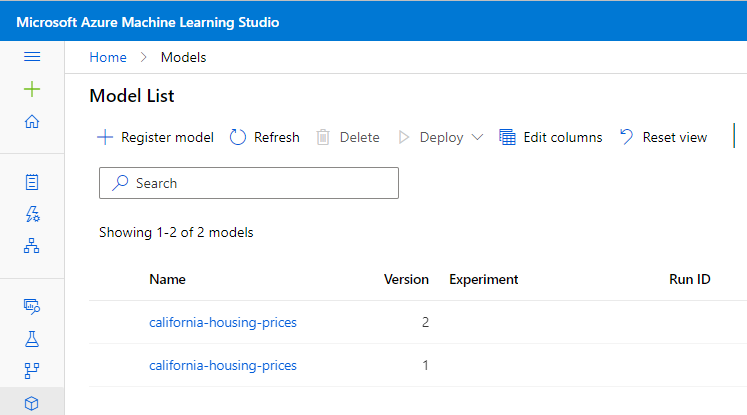
You can find the registered model under the Models section in Azure Machine Learning. Please note that Azure ML takes care of Model Versioning.
4. Model Serving
Finally, we build the Model Inferencing/Serving pipeline. Before serving a model, it needs to be deployed to a target. Here, we will use Azure Container Instances. However, before that, we need to take the following steps:
- Create Scoring Script
- Define the Environment Config
- Create an Inference Config
- Create the Deployment Config
A scoring script is an entry point to the Model. It comprises two functions viz. init() and run(). The init function loads the model, while the run scores the input against the model. Let’s write the scoring script. However, let’s create the directory in which the script will live:
script_dir = 'scripts'
dbutils.fs.mkdirs(script_dir)
script_dir_path = os.path.join('/dbfs', script_dir)
print("Script directory path:", script_dir_path)
Here is the scoring script:
%%writefile $script_dir_path/score.py
import json
import numpy as np
import pandas as pd
import sklearn
import joblib
from azureml.core.model import Model

columns = ['MedInc', 'HouseAge', 'AveRooms', 'AveBedrms', 'Population', 'AveOccup','Latitude','Longitude']

def init():

    global model
    model_path = Model.get_model_path('california-housing-prices')
    model = joblib.load(model_path)
    print('model loaded')

def run(input_json):

     # Get predictions and explanations for each data point
    inputs = json.loads(input_json)
    data_df = pd.DataFrame(np.array(inputs).reshape(-1, len(columns)), columns = columns)

     # Make prediction
    predictions = model.predict(data_df)

    # You can return any data type as long as it is JSON-serializable
    return {'predictions': predictions.tolist()}
Besides the scoring script, we need to define an environment. An environment is a configuration comprising dependencies to run your code. Here is our environment file:
from azureml.core import Environment
from azureml.core.environment import CondaDependencies

my_env_name="california-housing"
myenv = Environment.get(workspace=ws, name='AzureML-Minimal').clone(my_env_name)
conda_dep = CondaDependencies()
conda_dep.add_pip_package("numpy==1.18.1")
conda_dep.add_pip_package("pandas==1.1.5")
conda_dep.add_pip_package("joblib==0.14.1")
conda_dep.add_pip_package("scikit-learn==0.24.1")
conda_dep.add_pip_package("sklearn-pandas==2.1.0")
conda_dep.add_pip_package("azure-ml-api-sdk")
myenv.python.conda_dependencies=conda_dep

print("Review the deployment environment.")
myenv
With the scoring script and environment configuration ready, we create the Inference Config.
from azureml.core.model import InferenceConfig
inference_config = InferenceConfig(entry_script='score.py', source_directory=script_dir_path, environment=myenv)
Now, another piece to the puzzle is the Deployment Config, to create a Web Service. Here goes the script:
from azureml.core.webservice import AciWebservice, Webservice

description = 'California Housing Prices Predictor Service'

aci_config = AciWebservice.deploy_configuration(
                        cpu_cores=3,
                        memory_gb=15,
                        location='eastus',
                        description=description,
                        auth_enabled=True,
                        tags = {'name': 'ACI container',
                                'model_name': registered_model.name,
                                'model_version': registered_model.version
                               }
                        )
Finally, with everything in place, we create a Deployment Script:
aci_service_name='california-housing-service'

service = Model.deploy(workspace=ws,
                       name=aci_service_name,
                       models=[registered_model],
                       inference_config=inference_config,
                       deployment_config= aci_config,
                       overwrite=True)

service.wait_for_deployment(show_output=True)
print(service.state)
This takes around 10 minutes to complete. Once the model is deployed, it’s time to consume the same. In order to do so, we should be able to authenticate to the web service. Hence, we first retrieve the scoring key.
api_key, _ = service.get_keys()
Next, we prepare some test datasets:
data1 = [1.5603, 25,5.045455, 1.133333, 845.0, 2.560606, 39.48, -121.09]
data2 = [[8.1, 41,4.04, 1.2, 900.0, 3.560606, 37.50, -127.00],
[1.5603, 25, 5.045455, 1.133333, 845.0, 2.560606, 39.48, -121.09]]
Lastly, we generate predictions using the deployed web service:
import requests
import json

headers = {'Content-Type':'application/json', 'Authorization':('Bearer '+ api_key)}

response = requests.post(service.scoring_uri, json.dumps(data1), headers=headers)
print('Predictions for data1')
print(response.text)
print("")

response = requests.post(service.scoring_uri, json.dumps(data2), headers=headers)
print('Predictions for data2')
print(response.text)
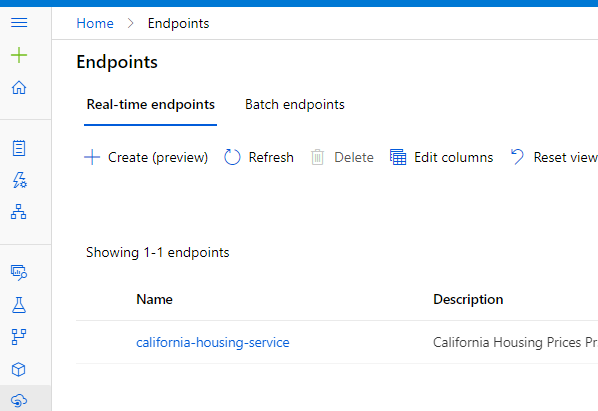
Lastly, do not forget that you can see your web service under the Endpoints section in the Azure Machine Learning studio.
2. Running Azure Databricks Scripts from Azure Machine Learning.
In the previous section, we saw that the entire ML Lifecycle was built on Azure Databricks, while the artefacts were logged into Azure Machine Learning. However, this duo (Azure Databricks and Azure Machine Learning) can work together in another way viz. Azure Machine Learning is the orchestrator, while the Azure Databricks acts as the compute engine. So how does this work? Before we move ahead, two concepts are key:
- Attached Computes
- Azure Machine Learning Pipelines.
Attached Computes
Azure Machine Learning workspace supports four varieties of compute:
- Compute Instances: Used for Development/Testing
- Compute Clusters: Used for Scalable Training and Batch Scoring
- Inference Clusters: Used for Scalable Inferencing
- Attached Compute: To attach external Compute options of choice like Databricks, Synapse, etc.
To run Databricks scripts out of Azure Machine Learning, we will use the fourth option viz. Attached Compute. However, to run the script to attach databricks compute, create a compute instance.

Once created, click on the Jupyter Notebooks section and open a new notebook to run the following scripts:
from azureml.core import Workspace, Experiment
ws = Workspace.from_config()
Next, use the following script to attach the Databricks Compute or the Workspace to be used.
from azureml.core.compute import ComputeTarget, DatabricksCompute
from azureml.exceptions import ComputeTargetException

db_compute_name=os.getenv("DATABRICKS_COMPUTE_NAME", "<DATABRICKS-COMPUTE-NAME>") # Databricks compute name
db_resource_group=os.getenv("DATABRICKS_RESOURCE_GROUP", "<YOUR-DATABRICKS-RESOURCE-GROUP>") # Databricks resource group
db_workspace_name=os.getenv("DATABRICKS_WORKSPACE_NAME", "<YOUR-DATABRICKS-WORKSPACE-NAME>") # Databricks workspace name
db_access_token=os.getenv("DATABRICKS_ACCESS_TOKEN", "<YOUR-DATABRICKS-ACCESS-TOKEN>") # Databricks access token

try:
    databricks_compute = DatabricksCompute(workspace=ws, name=db_compute_name)
    print('Compute target {} already exists'.format(db_compute_name))

except ComputeTargetException:

    print('Compute not found, will use below parameters to attach a new one')
    print('db_compute_name {}'.format(db_compute_name))
    print('db_resource_group {}'.format(db_resource_group))
    print('db_workspace_name {}'.format(db_workspace_name))
    print('db_access_token {}'.format(db_access_token))

    adb_config = DatabricksCompute.attach_configuration(
        resource_group = db_resource_group,
        workspace_name = db_workspace_name,
        access_token= db_access_token)
    databricks_compute=ComputeTarget.attach(ws, db_compute_name, config)
    databricks_compute.wait_for_completion(True)
The first parameter you need to provide is the alias to the Databricks Compute in the AML studio. The second is the resource group in which the Databricks lives while the third one is the Databricks workspace name. Lastly, you need the Databricks access token. To know how to get the Databricks access token, read this article.
Azure Machine Learning Pipelines
We created the above setup to run a Databricks script in Azure Machine Learning Pipeline. However, before that, what is an Azure Machine Learning pipeline and how could Azure Databricks help? An Azure Machine Learning pipeline is a provision to create Machine Learning workflows in AML studio. For an example, refer to our article on AML Pipeline for Model Training.
Having said that, Pipelines comprise steps. In Azure Machine Learning, steps could be executed using a variety of compute targets; one of them being Databricks. And that is where the Databricks attached compute comes into play. Now, coming to the question of why this may be necessary, it depends. Data Scientists may prefer to leverage the power of Spark for certain sections of ML workflow like Data Cleansing of Pre-processing. Let’s say we want to run the below script placed in a Databricks notebook through Azure Machine Learning:
import pandas as pd
from sklearn.datasets import fetch_california_housing

california_housing = fetch_california_housing()
pd_df_california_housing = pd.DataFrame(california_housing.data, columns = california_housing.feature_names)
pd_df_california_housing['target'] = pd.Series(california_housing.target)

pd_df_california_housing_clean = pd_df_california_housing.dropna()
spark_df_california_housing_clean = spark.createDataFrame(pd_df_california_housing_clean)
spark_df_california_housing_clean.write.mode("overwrite").saveAsTable("california_housing_clean")
This can be achieved using DatabricksStep in Azure ML Pipelines as shown below:
from azureml.pipeline.core import Pipeline, PipelineData
from azureml.pipeline.steps import DatabricksStep
notebook_path = os.getenv("DATABRICKS_NOTEBOOK_PATH", "<YOUR-DATABRICKS-NOTEBOOK-PATH>")

dbNbStep = DatabricksStep(
    name="ADBNotebookInAML",
    num_workers=1,
    notebook_path=notebook_path,
    run_name='ADB_Notebook_Run',
    compute_target=databricks_compute,
    allow_reuse=True
    )
On a side note, to get your Databricks notebook path, right-click on your Databricks notebook > Copy File Path.
Nonetheless, once the Databricks Step is defined, create an Azure ML pipeline experiment to run it.
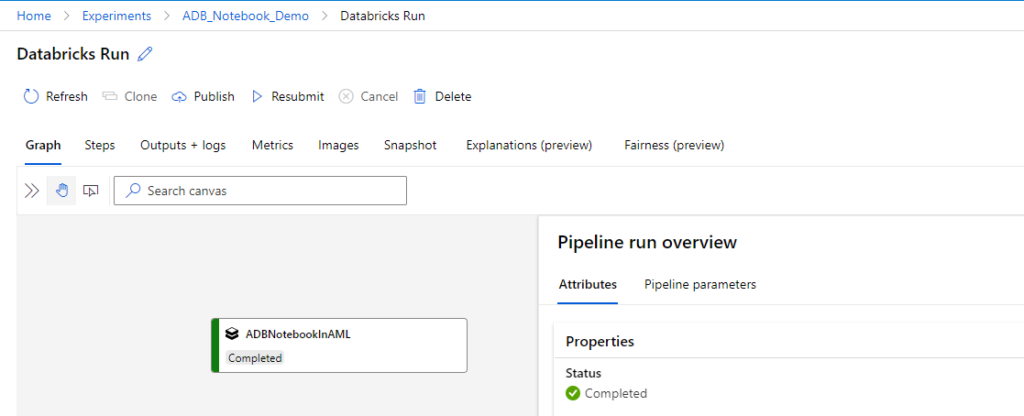
steps = [dbNbStep]
pipeline = Pipeline(workspace=ws, steps=steps)
pipeline_run = Experiment(ws, 'ADB_Notebook_Demo').submit(pipeline)
pipeline_run.wait_for_completion()
You can go to the experiments and check your pipeline experiment viz. ADB_Notebook_Demo.
As a sanity test, check if your new Databricks table has been created. But, we leave that to the readers.
Conclusion
This is an introduction to Azure ML and Azure Databricks together. In no way does it mean that we are comparing the two. Lastly, this article is for information purposes. We do not claim any guarantees about its accuracy or completeness.