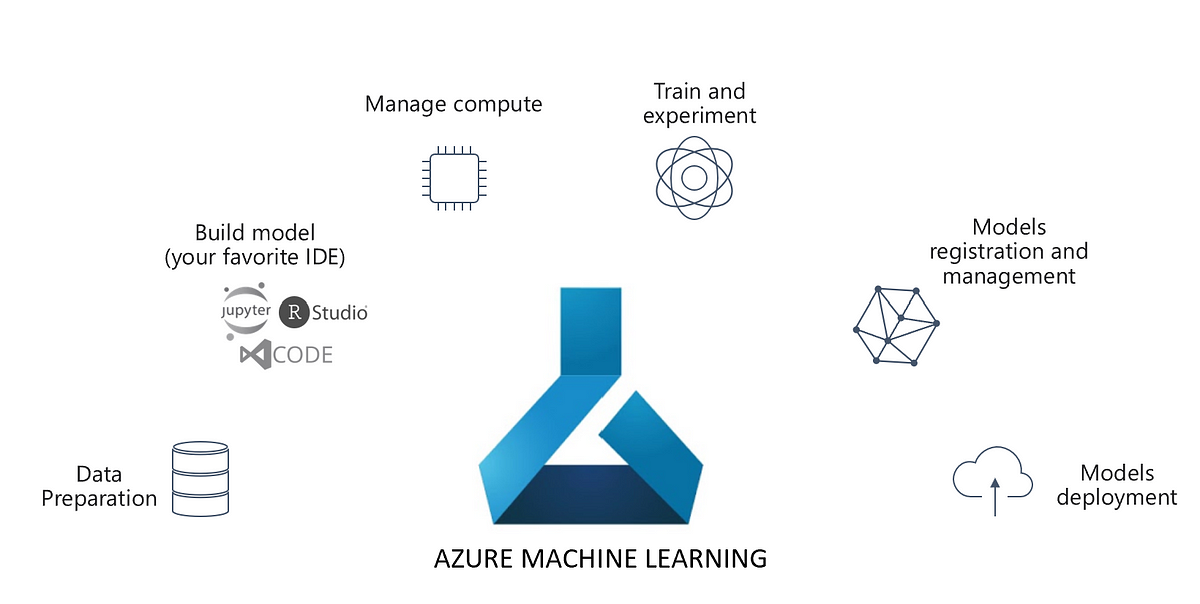
Prologue: The Azure Machine Learning family
Data Science process entails data extraction, data preparation, modeling, training, testing and evaluation, deployment etc. Every phase requires an extensive amount of programming. Further, the skillset required is scarcely available. Hence, in order to help organizations adopt Data Science in a simple, cost-effective manner, Microsoft launched Azure Machine Learning Studio.
However, there are inherent limitations to this visual tool. Firstly, we have limited control over the computing power used underneath. Secondly, we do not have the flexibility to deploy the models using services like Azure Container Instance or Azure Kubernetes service. Lastly, for seasoned Data Scientists, the pre-built machine learning algorithms allow limited control over hyperparameters and no control over the parameters, thus abstracting the subtle details of the underlying algorithm. One might argue that you can create an R model in the studio. However, the same is not available with python, which is catching up amongst Data Scientists.
Azure Machine Learning Services
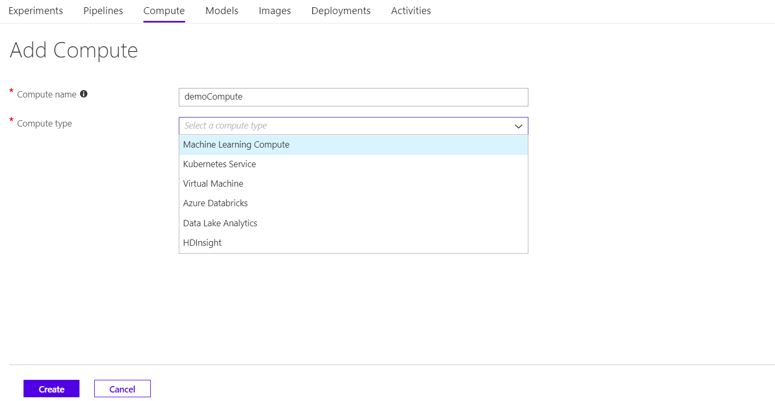
In order to address the above limitations, Microsoft came up with Azure Machine Learning Services, which takes a code-first approach (with Azure Notebooks), as opposed to the drag and drop approach of Azure ML studio, thus enabling Data Scientists to have more control over their ML model with languages like R, Python, F# etc. Additionally, it addresses the other two limitations of Azure ML studio viz. compute and deployment. In Azure ML services, you can run your code on top of any of the below compute:
Furthermore, you can deploy your models to various targets like Azure Container Instance, Azure Kubernetes service, IoT edge etc. For more on deployment, refer to this documentation: Deploy models with the Azure Machine Learning service.
The Visual Interface
Having said that, both development and deployment with multiple options in Azure ML service gets cumbersome and requires some Data Engineering and application development skills. This becomes challenging for Data Scientists with a limited programming background. In order to bring the best of both Azure ML studio and Azure ML service, Microsoft has added a new authoring tool as a part of Azure ML services i.e. the Visual Interface.
Authoring
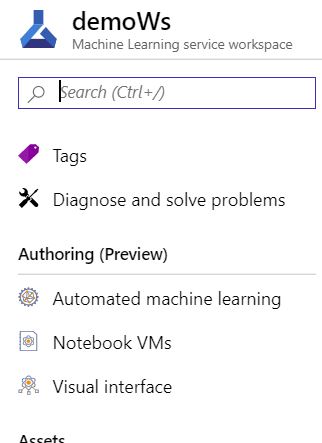
Go to your ML services workspace and select Visual interface is Authoring pane as shown below.
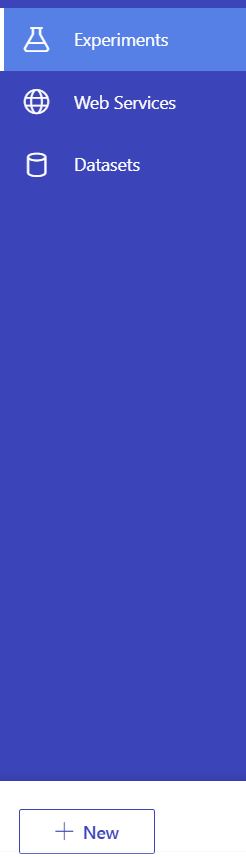
As far as the look and feel are concerned, the Visual Interface is an avatar of Azure ML studio. Open the Visual Interface and create a new Experiment by clicking the ‘New’ button.
Since Visual Interface is similar to Azure Machine Learning Studio, as far as authoring is concerned, we won’t go through a detailed step by step instruction on how to build a model in the Visual Interface. We encourage you to read our previous article for the same: Motivating Data Science with Azure Machine Learning Studio.
In this example, we will use the kaggle dataset Credit Card Fraud Detection. This is a typical classification/ supervised anomaly detection problem, where positive cases are rare. Below image shows the simple model that we have built over this dataset.
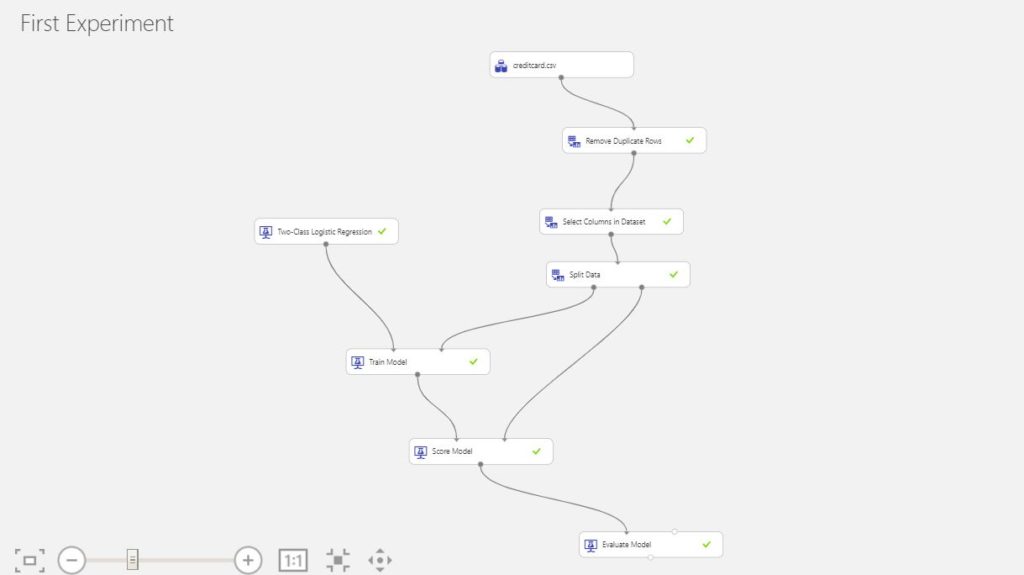
First, we import an uploaded CSV file consisting of the data from My Datasets in Saved Datasets. Next, we remove duplicates from the data followed by feature selection using Select Columns in Dataset module. Further, we split the data into train and test data using Split Data. The first split goes to training the model using Train Model while the second one goes to score the model. Here we train a Two-Class Logistic Regression. Finally, we evaluate the model using Evaluate Model.
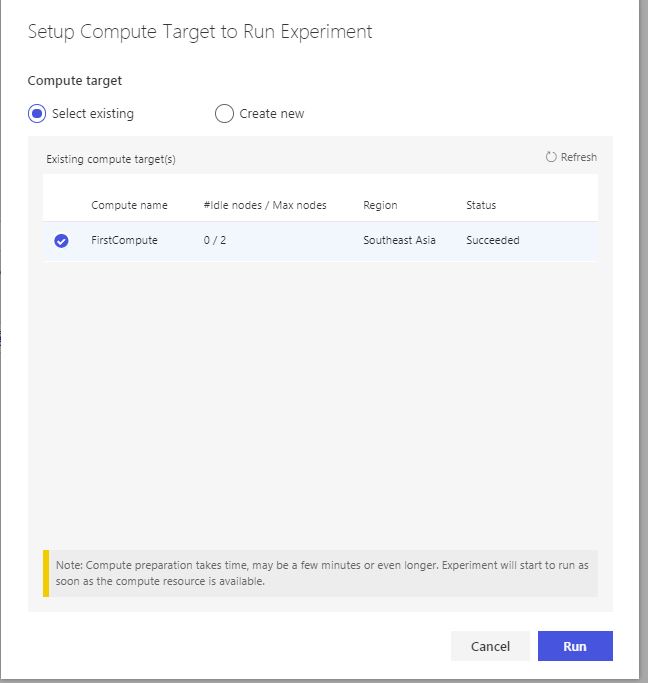
Before we evaluate the model, let us run the created experiment. During the process, it will ask you for the compute you want to use. Here comes the first advantage of Visual Interface over Azure ML studio, where you have no control over the compute except for service tiers.
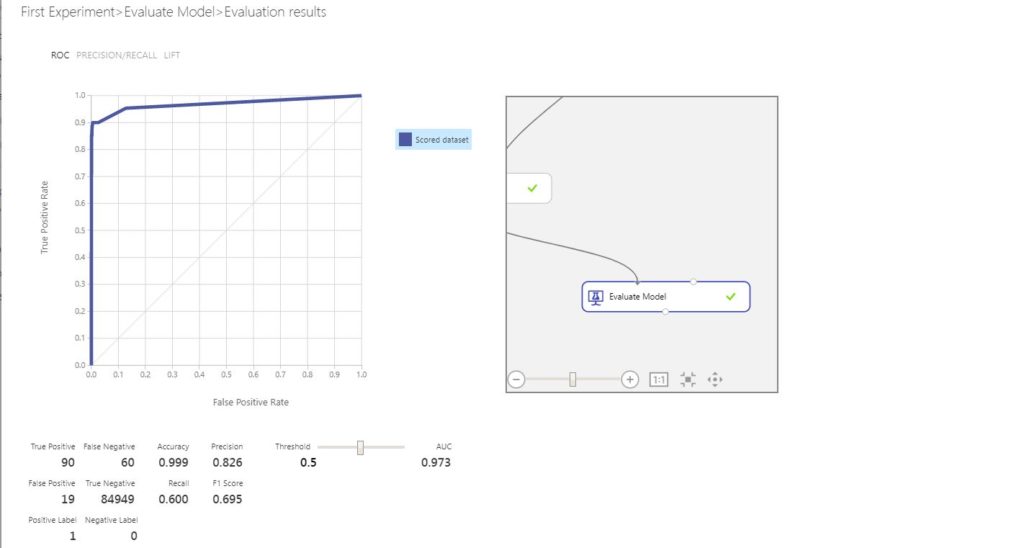
Below image shows evaluation results.
Deployment
Although Visual Interface is still in preview and has multiple limitations in terms of functionality, as compared to Azure ML studio, it has tremendous advantages in terms of deployment of models. This the second advantage of the former over the latter. You can deploy your models with various options like Azure Container Instance, Azure Kubernetes service, IoT edge etc, with a few clicks as opposed to writing cumbersome code with other authoring tools like Notebooks, Automated Machine Learning etc. Let’s walk through the steps involved in the deployment of models authored with Visual Interface.
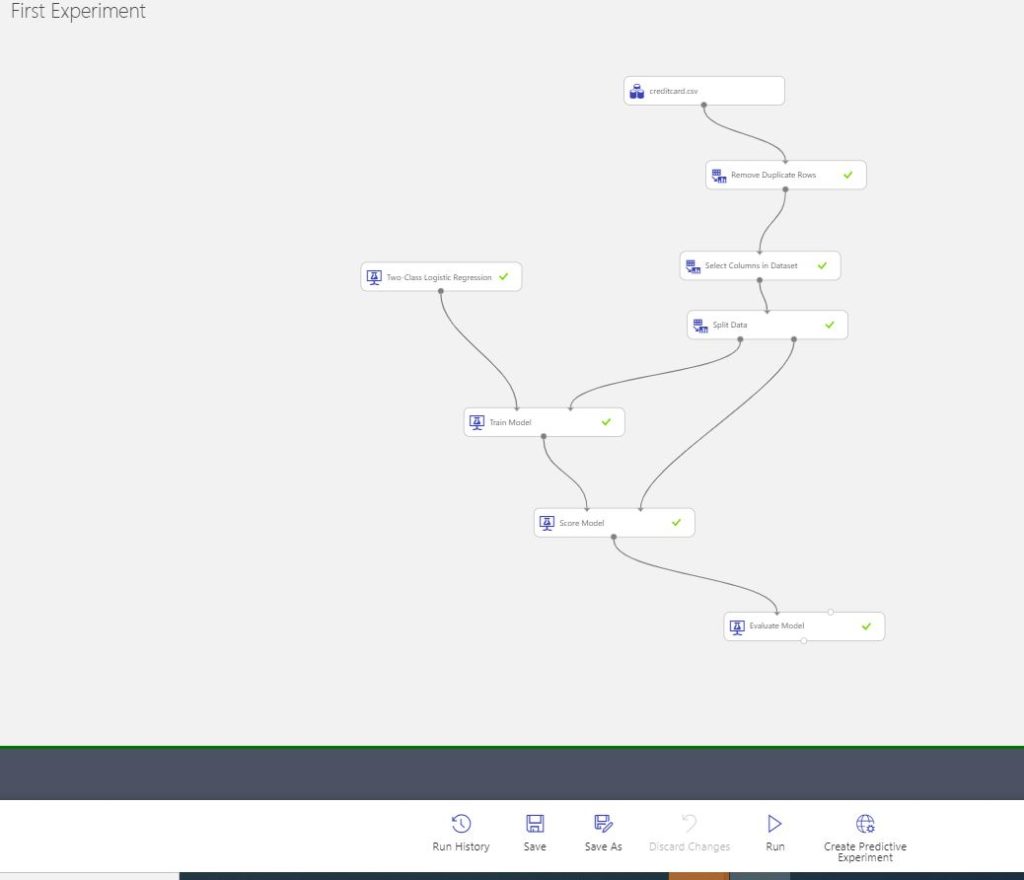
Step 1: Create Predictive Experiment
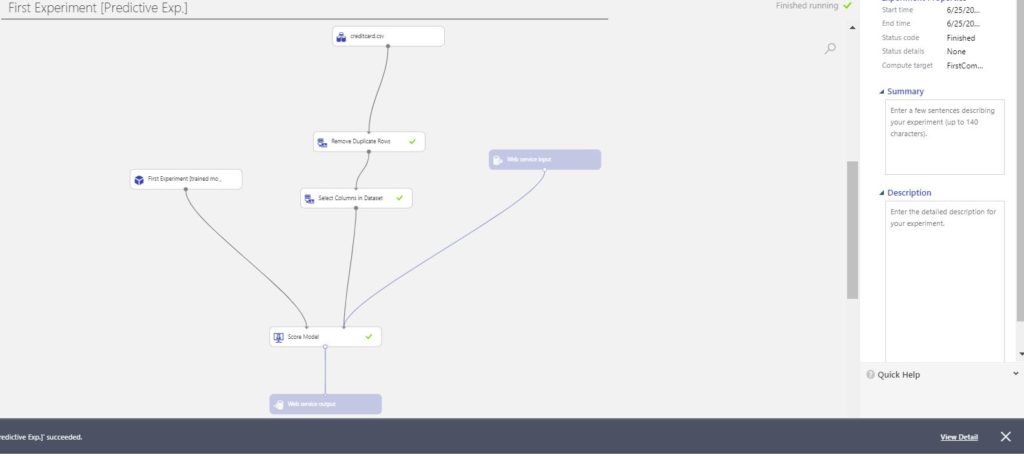
Once you run the experiment, click on Create Predictive Experiment as shown below.
Step 2: Deploy Web Service
Once you click on the Create Predictive Experiment, change the web service Input to Score Model, since the input to score model is generally best-selected features. Make sure that you remove the Label Column i.e. ‘Class’ since it does not make sense to pass the label as a web service input parameter.
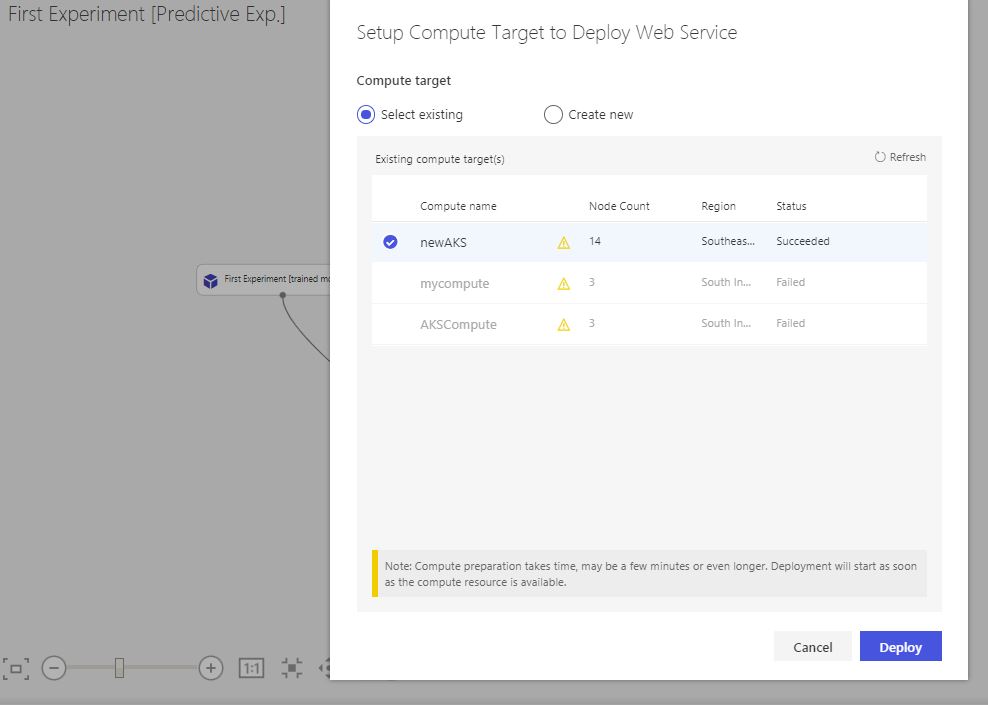
Run the predictive experiment and click on Deploy Web Service. During deployment, you will get an option to select your target. We will use Azure Kubernetes service named newAKS in this experiment. Make sure that you create an Azure Kubernetes service with Node Count greater than 12. For more on how to create a Kubernetes cluster in Azure, follow this documentation.
Step 3: Test the web service.
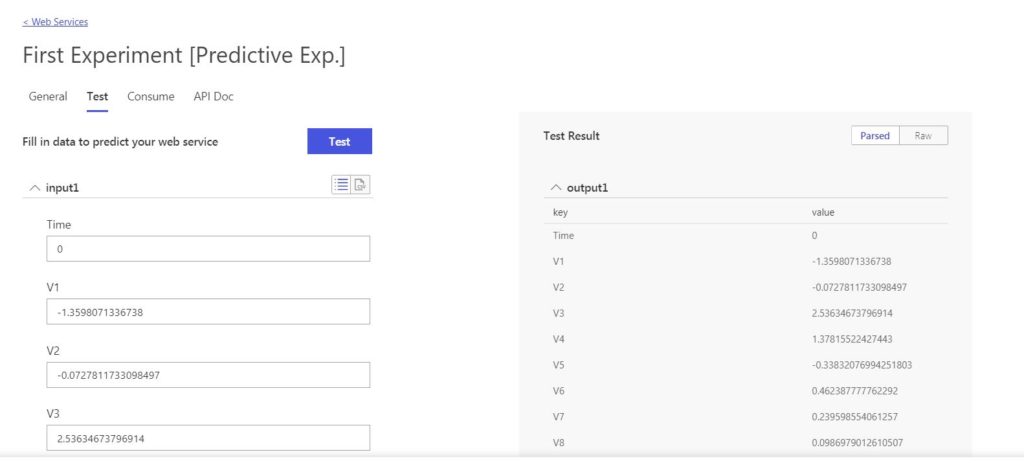
After the completion of deployment (takes time), click on the ‘view detail’ in the notification that pops up.
This opens up a new window with options to Test and Consume your web service along with documentation. We will test the API here with Microsoft’s prebuilt web interface.
Epilogue
Although this tool is still in preview, with many limitations as far as Machine Learning models are concerned, this seems to be the future of Microsoft’s AI landscape. We encourage you to check it out. For an interesting use of Azure ML studio, read this article of ours: An Introduction to Azure IoT with Machine Learning
Disclaimer: The articles and code snippets on data4v are for general information purposes only. We make no representations or warranties of any kind, express or implied, about the completeness, accuracy, reliability, suitability or availability with respect to the website or the information, products, services, or related graphics contained on the website for any purpose.


Nice work..keep it up
Thanks Sanajit. Encourage you to read all the other articles.